Screen recording is a good useful feature for many things, especially when it comes to creating tutorials. When a screenshot is worth a thousand words, the screen recording goes through a few continuous steps.
Not only that, but we will also show you how to convert your screen recording into professional videos using the InVideo online editor.
Table of Contents
How can you record a screen in Windows 10?
On Windows 10, you can record your screen using the built-in tool – Game Bar. Designed to record playback times for PC and Xbox, but can also be used to record other applications and activities.
First, open Game Mode on your system:
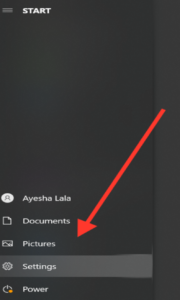
Step 1: Click on the start menu and select settings
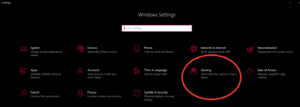
Step 2: From the settings window, click on Gaming.
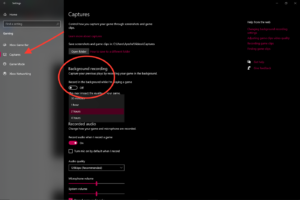
Step 3: Go to Game Mode and open Game Mode

Note: To check the duration of the screen recording time, go to the Game Bar settings. Click on the Start menu and press Settings. Click on Gaming. Underneath the scan will be the background recording option. Choose from the recording time down from 30 minutes to 4 hours.
You are now ready to record your screen. Windows 10 Game Bar can only support screen recording of one application at a time. This means you cannot switch to recording another window or ALT + TAB your way after you start recording. Also, note that you cannot record your desktop, File Explorer, or Maps.
So, let’s get down to the steps you can take to record your screen using the Game Bar.
Step 1: Open the app you want to record. Close some windows and make sure no unwanted noise will infiltrate your recording.
Step 2: Press Windows + G on your keyboard. This should open the Game Bar.

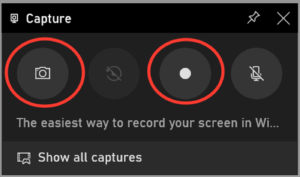
Step 3: In the ‘Capture’ window, click the Camera icon to take a screenshot. To start recording your screen, click the dot circle (or press Windows + Alt + R).
Step 4: Once you start recording, a timer, recording controls, and microphone will appear. Microphone to turn on and off external sounds to record comments. Internal sounds will be recorded automatically.
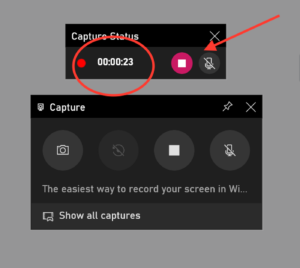
Step 5: Press the stop button or press Windows + Alt + R again to stop recording.

Step 6: A pop-up will appear on the right saying ‘Game clip recorded’. Click pop-up to see that your screen recording is stored in the ‘Captures’ folder in File Explorer.
How can you record video on Windows 10 or any PC?
Now that we have covered Windows 10 screen recording, let’s see how you can record Windows 10 videos with any other PC.
Just follow these simple steps:
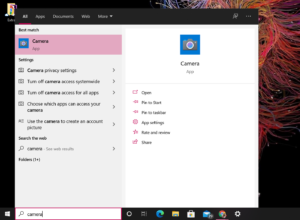
Step 1: Hit that start menu and launch the ‘Camera’ app located under the All Apps list.
Step 2: Once the camera is on, there are the right options, photo or video mode. The app will allow you to record a three-hour limit.
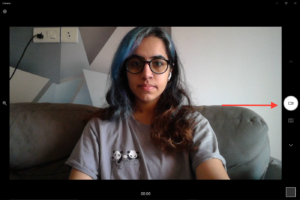
Step 3: When you have finished recording your video, it is automatically saved in the Camera Roll folder.

If you are using a PC to record videos without a built-in camera, you will need to connect a webcam to your PC. Here is a very simple tutorial to help you record and take video at the same time.
And for better quality and more freedom regarding the duration of the video recording, a third-party application will be required. Continue here to see InVideo editing of the best webcam recording software currently available.
BONUS: How can you convert your screen recording into professional videos in minutes?
You have your recording and screen capture. Now, if you want to make an impact and go a long way, you may want to convert your recordings to fully organized videos with music and text. This is where an online video editor like InVideo can work. You can easily create professional quality videos in minutes even if you have never edited the video before.
Here’s how you can use InVideo app to record screen for an alternative:
Step 1: Sign up for an InVideo account if you have not already done so. Click on “Empty Canvas”, select the size, and then click “Make Video” to get started.
How to convert your screen recording into professional videos in minutes_ Step 1
Step 2: You will now be taken to the InVideo Editor. Click the “Upload Media” button or drag and drop your files into the center editor
Step 3: Once uploaded, drag your video to the center of the workspace to start making your changes. Pop-ups will ask you if you want to reduce your video. Make any changes you want to make or use the full version. And now your visual effects are ready.
Step 4: When you are done, it is time to choose from InVideo’s built-in music collection for all shapes, genres, SFX, and more in the music icon located on the left of the screen. Or, if you would like to add your music to this project, simply click the Upload music option on the right of the search bar to upload files to your system.
Step 5: Drag and adjust the timeline – to match your music and text to visual effects.
Step 6: When you have finished testing, click the Download & Share button, select the quality of your video, and then press “Release”.
Step 7: If you would like to add text to your video, simply click on the text tab from the options bar on the left. Choose from a collection of fonts and typographies.
Step 8: And you’re done! Download the video or share it directly on your social media platforms.

Leave a Reply